Airi (Meru Puri)

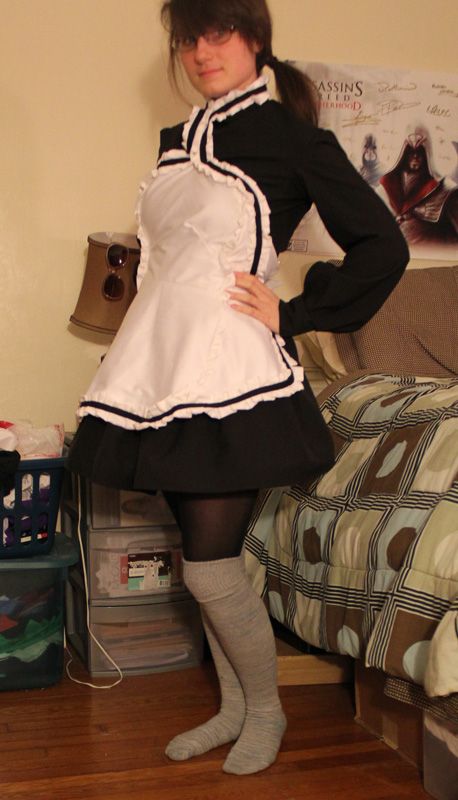
Airi was a bit tough to start off with. Not because of the dress but the apron. She has one of the most unusual aprons I've seen in a while. I really had to decide how I wanted to break it down, since it didn't seem normally possible. She didn't have the normal straps like most do...they seemed to wrap around her neck and then just sort of hold there.
I ended up breaking it down into two main parts. The dress and the apron. The dress was very simple. Just something high collared and long sleeved. It was probably the easiest part of sewing the whole thing. I think my favorite part ended up being the sleeves and how the shape turned out for them! The base of the dress, like most of these types of dresses I've had to make is based off of this pattern. I like that pattern because the skirt is really full and perfect for putting something like a peticoat under it.

The apron was the most interesting to tackle. Originally I tried to make it all in one piece like they had in the image, but I had to made an adjustment which created the seam in the middle. I created the pattern myself, and broke it into three parts. The middle and then the two sides that extend towards the back. I used snaps to hold the apron together in the back, over top of that I had a bow pinned there, to make it seem as though the apron was tied in the back. The parts around the neck were all held together by snaps, and wrapped around my neck. So when I had to put the apron on I had to stick my head through what wrapped around my neck and then snap it in the back. So the snaps held it together on my body! It stayed really nicely.

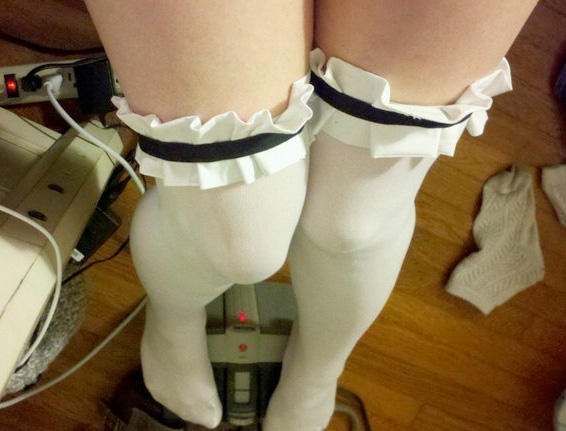
The ruffles were all done by hand. I keep saying someday I'll invest in a ruffle foot and I have yet to do so! But I created the ruffle all around the apron and the stockings. The middle black part is just bias tape sewn to the center of the ruffle. For the stockings the ruffle on them was added later. I created the ruffle and sewed it onto the stocking while I was wearing it. It just needed a few little stitches to attach it to the material and stay on.

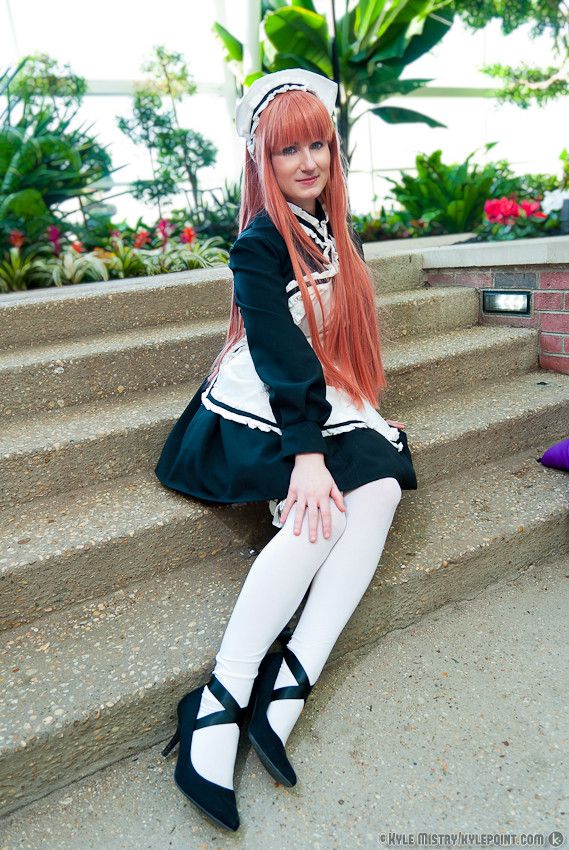
And last but not least was the headband. it was a fairly easy mod from a pre-exsisting headband. I added the ruffle and then glued the white cloth on top. The other little touch is the ribbon on the shoes. I was using a pair of shoes that I tend to use in nicer occasions and I didn't want to modify too much. So instead of attaching the ribbon to the shoe, I instead attached it to the stocking. I wrapped it around my foot and tied it around the back. To get it to stay I just created a small, easily cut away, stitch that I could remove at the end of the day. That way I didn't ruin my shoes or stockings!
And then the final product...

