Sunday, June 2, 2013

Costume Breakdown: Rise Kujikawa

I've always been a big fan of the SMT series of games, more recently the Persona series. I had put off playing them for the longest time, but finally broke down when my friend let me borrow her copy. I really liked the game, most importantly I liked Rise the most. She was just so cute and bubbly, and I felt for her backstory, so of course I had to make her.


For the top I picked a basic twill, which works for any basic suit or uniform. The base of the top is made from Simplicity 8523, I wanted the V neck they had and the basic shape. But the shirt is meant to be loose, so I had to take it in to be more fitted.


Looking at her reference, she had these little seam details on the top, all I did for that was create panels and top stitched them on top. They're not really super obvious, but I wanted the detail there, so it was really for myself.

The little modesty collar with the logo on it was just painted on. I used the freezer paper method and painted it on. I sewed in a little clasp so I can open it and stick my head through. The turtleneck is actually a dickie and it was not sewn by me.

The white stitching detail was all done by hand. I used embroidery floss and a chenille needle. A chenille needle is basically a thicker needle, something that I could use to break through the fabric with a thicker thread. I went through by hand and just stitched it in. You can take a piece of chalk and mark off the fabric by hand, but I just sort of eyed it up for the most part. The stitching goes all along the top. It surprisingly wasn't as time consuming as I thought it would be.


The sailor collar is based off of Simplicity 2072. Their collar goes down a bit lower then what I would need it to, so I needed to adjust it for my own top. The yellow stripe is just a piece of bias tape top stitched down onto the collar.


The fabric for the skirt was probably the toughest part. They have a rather specific color, grey on black, which I wasn't lucky enough to find. So I found a cotton print, black and white, houndstooth and I dyed it grey. After that it was rather easy to make up a pleated skirt. I used Butterick 5285 and shortened it to the length I needed.


For the shoes all I did was paint the stitching detail on, otherwise they're basic black loafers. 

The wig was bought from Epic Cosplay, who was rather wonderful and got my wig to me pretty quickly. And that's the details of my Rise costume!
Finished Costume Shots!

Sunday, May 5, 2013

Monomi Kigurumi

I always thought that Kigurumi's were really cute, they always looked so big and comfy, but there was never one particular design that I was attached to. I've been reading Super Dangan Ronpa 2 and thought it would be cute to make a kigu based off of Monomi.

The nice thing about patterning a kigu is that they're meant to be really oversized. So you don't need to be exact with your measurements like you would with a normal costume. The pattern for this kigu was based off of this tutorial I found. The measurements they offered as well as how the shapes were supposed to be offered me a great guide to draft my own pattern. Drafting a pattern is completely optional of course, but I'm the kind of person that needs that kind of guide just in case I mess up.

The sleeves were made to cover my hands, so I could match her a bit more. There are slits on the wrists so I can open them and use my hands if I so need to. The bottoms have elastic to stretch and hold around my legs.

The hood's details were hand stitched on. I used the same methods I would for making plushies. The face details have just a ladder stitch detail so you can't see it. The ears were lightly stuffed so they would stand up more and then hand stitched on top. I also decided to line the hood with a light quilting material that matched the pink I had, just so it would have a more finished look and not show all of my work.

For materials I chose a basic blizzard fleece. Fleece is super comfy, warm and easy to use, but because it's made from fleece I probably wouldn't recommend wearing this during warmer weather, otherwise you might sweat to death

Sunday, March 3, 2013

Costume Breakdown: God Tier Jade


This costume is fairly simple to make, I wanted something that would be easy to wear. I really liked the Witch of Space design so I decided to make it!

 I’m going to go into the fabric choices. I don’t always go into that, but I felt like I should here. The skirt was made out of a grey sateen. What’s nice about sateen is that is has a good weight to it, without the glaring shine that a satin might have. The top was a stretch knit, because I wanted the top to be like a tunic, that I could just easily pull over my head. The hood is made out of the same material as the skirt.

The skirt is a basic circle skirt. The circle skirt has the basic shape and fullness that I wanted for it. The tunic part was highly modified based off of a shirt pattern. I didn’t have a pattern on hand that was perfect, so I went with something similar. I used Simplicity 8523 with the scoop neck. I made sure to adjust the pattern so I hand the points on the front and back like she does in the design. The sleeves were from another pattern that I had laying around that I just added to the tunic.

The Space pattern I found a vector and then created a stencil. Your best bet of painting this sort of thing onto fabric is to use the freezer paper method, in this case I didn’t have any on me, so I just free handed it. I wouldn’t recommend free handing it if you’re not confident in your painting skills.


The hood wasn’t too hard to figure out, I needed to modify and adjust for the twin tail hood that she has. I created this basic pattern for what I did.

The hood is super easy to make once the pattern is figured out, hopefully this will help anyone else working on it.

The ears were not made by me, sadly I had made a pair for myself based off of this tutorial, but I lost one of the ears. So the day of the con I first wore them, I bought a pair of ears made from fleece. I do not remember the booth I bought them off of, if anyone recognizes them I will gladly give them credit. But from what it looks like, it looks like fleece on a headband. I put the headband on and the hood over top so it hides the band.

The socks were purchased from sockdreams and they’re two long thigh high socks. My only real issue on them was that they were really baggy around my feet and calves, but tight around my thighs. I pretty much needed to yank them up every so often while I was walking, even after I adjusted them. They’re a knit material so that might take into an account for how they fit. But the color and stripes are perfect for the grey on grey striped detail she has going on.


Friday, March 1, 2013

Costume Breakdown: Kanaya Maryam


Homestuck wasn’t something I thought I’d get into as much as I have. It was one of those series that was super popular but I never really got, until I sat down and gave the whole thing a read, and I pretty much got hooked from there. Kanaya is my favorite troll out of the bunch; I wanted the chance to make some of her fantastic outfits. The first on that list being the red dress she wears.

I’ll start this off by first saying I didn’t make the horns. I bought them from the lovely lambentworld. She does amazing crafting work, you should check out her page.

The dress itself is slightly modified from its original design. From the way that its drawn, the collar looks similar to a mandarin collar. But the dress pattern I wanted to use was based off of a vintage style dress with a larger collar. I took a bit of artistic liberties and went with that instead. I generally try and stick closer to the source material rather then embellishing, but I loved the pattern so much I stuck with that.

The pattern I used was newlook 0110 . I thought it suited the style that she would go for, and how the dress seems in the series. The stripped type pattern she has was painted on. I made sure to draw the design on first, mask it off with painters tape and then used Tulip Fabric Paint to paint on the design. It’s not a difficult process just tedious. You need to make sure you paint in layers, and wait for the paint to dry before moving on. But it created a really nice result and I was happy with it. I used the same process on the collar, cutting fabric out of the same red then painting over it, so I could get it to match the stripped color.
The dress with all accessories but makeup and tights.
The belt was reused from an old waist belt I had sitting around. The logo on it is just craft foam. Though I would probably seal and find a way to make sure it won’t just easily crumple. It stayed on, but when I was sitting/moving my body would constantly bump against it.

I decided rather then paint my arms I made myself some quick armsocks. There’s a lot of really wonderful tutorials out there on how to make them, mine are a little more simple, because I was wearing gloves already, I didn’t need to make finger holes in mine. I took a pair of tights, matching the ones I used on my legs, and attached each leg on an arm hole, doing a quick stitch to keep them in place on the sleeves. Then cut off the ends so I could pull my arms through. Super simple and it was one last thing I had to worry about painting.

My face with painted with Ben Nye White face paint. Again, there’s a ton of tutorials out there how to do it, but I’ll go over my own process. Since I was going for her as a rainbow drinker I needed a very white, clean face. Getting that shade of white with just the Ben Nye is a little difficult. The facepaint has a habit of being a bit translucent, so you need to paint it in layers.

Makeup test
 My first step is to prime my face like I normally would with regular makeup, moisturizer and then primer to keep my face looking smooth and to hold the makeup better. I take a makeup sponge and rub the first layer on my face. From there I just keep building up. You don’t want to just rub the makeup on your face once you start getting the layers on, other wise you’re just pushing it around/off your face. After a while you’re going to want to work a patting technique, so it smooth’s how the makeup looks on your face. When I was applying the white paint I made sure to put it anywhere that might show; my neck, under my jaw and the back of my neck. After applying the paint, I use the Ben Nye White Powder. The powder helps set the makeup and keeps your face from looking shiny. I went with white instead of translucent because it gives a stark white look. The translucent works better when you have different colors on your face, but I want a super white look. It also can help even out any makeup that might look a bit smudged. After adding the powder I add on any little details I want, stuff like eyeliner, eye shadow, contorting and lipstick. For this instead of actual black lipstick I just used black eyeliner for my lips. Adding the little details helps make your features stand out against all the white on my face. After putting on the paint, you'll need to highlight your eyebrows as well. I just took a eyeliner pencil and filled them in over the makeup.

And that’s pretty much it! Everything I did to actually make the costume. The shoes were a pair I already owned. The stockings for the armsocks and my tights were bought from sockdreams. The gloves were also purchased on a ebay.

Finished Costume!

Monday, September 3, 2012

Costume Breakdown: Female Protagionist

I'm a big fan of the Shin Megami Tensei series and wanted to cosplay it with my friends. So we had a small group for Persona 3, since we had all played it and liked it. This was actually my first SMT costume, before Hua Po, worn and made a few months a head of time.
Photobucket 

The outfit seems pretty basic. It's just a uniform shirt, skirt and blouse right? For fabric I chose a basic twill. I ended up having a good amount laying around, it wasn't extremely lightweight, but it worked well and had the right look for a uniform. The skirt wasn't really an issue. The skirt itself was just a basic box pleated skirt. For a pattern I used Butterick 5285 and adjusted the length to what I needed.

The jacket was a challenge in itself. It was a somewhat odd shape, it didn't have the normal lapels like a normal jacket would, it had this odd box shape around the top. So I ended up taking a normal shirt pattern (simplicity 8523) and modified it from there. There was a lot of modification from that and this is what I ended up with.

Photobucket 
Here's a basic pattern for the jacket and skirt. The jacket ended up being a bit large, as in not fitted after I drafted it and put it on.

Photobucket 

As you can see the jacket is pretty large and a bit too long from the initial pattern. I needed to take it in a bit more and adjust it so the fit and proportions were right.

Photobucket 

With the fitting, everything looked much better, and wasn't so odd and baggy. You can see a bit of a top panel, with some studs in place, that was just sew into place on the longer flap, so they don't really move or adjust. To keep the jacket closed, I added in a zipper. I wouldn't recommend doing it like I did...I ended up getting an invisible zipper and sewing it in so that the end was at the top of the jacket, so I need to pull the jacket over my head. I would not recommend doing that, it makes things just a bit more difficult.

The two lines on the jacket are just bias tape. The one is just sew on the right hand side, while the left one is sew as close as I could get it to the zipper, so it wasn't noticeable there was a zipper there.

Photobucket 

The bow was just made and then a strap was added around my neck. And the blouse was just one that I had laying around. While I wouldn't recommend this for everyone, I used my own hair for this cosplay. I figured I could get it good enough to pass. This is the best I can explain how I did my hair. I pulled my hair back into a low ponytail, twisted and pulled it up, clipping it to my head with a claw clip. The hair that hung out, I teased and pooffed out a bit so it had a bit more volume. The banged were styled with a bit of product and hairspray.

The patch, and the armband were pre-bought, and the envoker was made by a friend!

Photobucket 
Here's a good shot, how my hair was styled. 

Photobucket
And a nice full body shot of my costume. The socks were bought from sockdreams!

Sunday, September 2, 2012

Costume Breakdown: Fuu Hououji

It's been a while since I updated. And I'm a bit late in posting about Otakon, so I might not even make a post about that. Instead I'll just talk about some of the costumes I wore for Otakon this year. This Otakon was a rather simple costume year for me, I didn't really go all out and make something extreme, though most of my costumes have an element of simplicity to them. But with this year my friends and I decided to do a Magic Knight Rayearth group. But rather then do the default outfits, we decided to make something from one of the artbooks.

Photobucket 
I had wanted to cosplay Fuu for a long time now, and I just love making maid costumes, so it was a win/win situation.

We all needed matching outfits, so we all decided on a cotton sateen, so it was a bit nicer but without a shine. We also made sure to match patterns. We decided on Simplicity 3618, since it had a lot of what we needed in one pattern.


For reference we went off of the pirate costume. We used the skirt, vest and the included bloomer pattern for our costume. The vest and skirt was modified, so that they were attached and one piece rather then separates, which was a really easy adjustment. The skirt itself is just a basic circle skirt pattern, I have about 2 and half panels on mine. I also added a nice fluffy peti to make it poof out a bit more. There's a zipper on the size so I can get in and out of the dress. And for the edges around the bodice I just faced them and used just a bit of glue to hold it down.

Photobucket 
 
The blouse we decided to just make from scratch, that way we could all have the same blouse. We used Simplicity 1941 and then adjusted the sleeves so that they were puff sleeves rather then the normal ones they have.

The shoes I had a bit of freedom on. Since you can't see her shoes I could pick whatever I wanted. But since I'm in actuality the shortest person in the group I needed something that would give me a bit of height. I found these really nice green heels that not only matched my dress perfectly but gave me just a bit of height so I could be taller then our Hikaru and match height with our Umi. The stockings come from We Love Colors. My only issue with them was that the fit was suuuuper tight, like almost impossible to keep up without rolling down. And it was the first time that sock glue didn't hold them up.

Photobucket 

The ribbon around my neck is just a plain satin ribbon we bought in a spool, so we all had matching ribbons and its pinned to the collar of the shirt. And the ribbon on my head was made from leftover fabric from the dress. All together it was actually a rather simple costume to make. The work was making sure we were all coordinated, getting the same type of fabric and patterns.

Photobucket

Sunday, May 20, 2012

Costume Breakdown: Hua Po

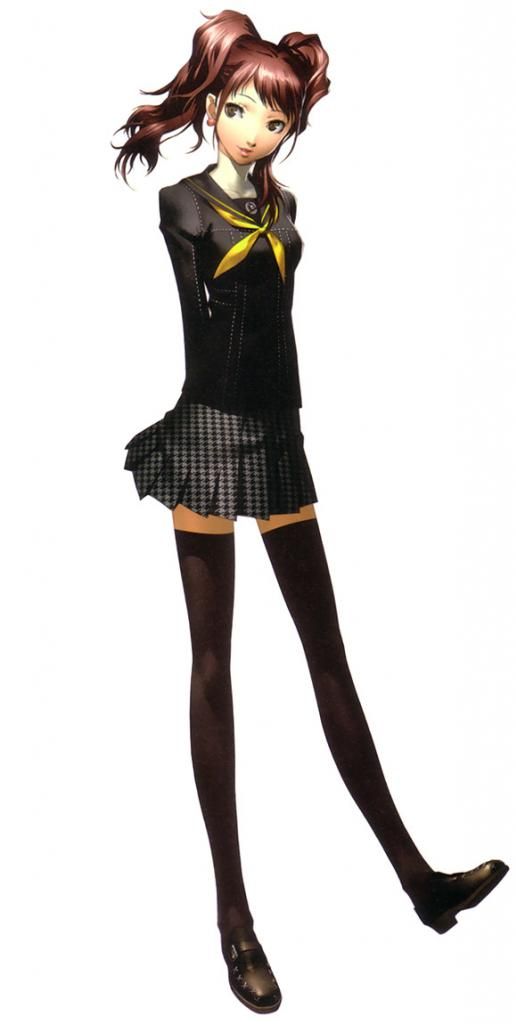
Hua Po was one of my dream costumes for a long time. A lot of the aspects of the costume are really simple but it was one, when I first started cosplaying, that seemed impossible for me to do at the time. So finally last Katsucon I decided I had the skill set to actually accomplish this and make it.

Photobucket 
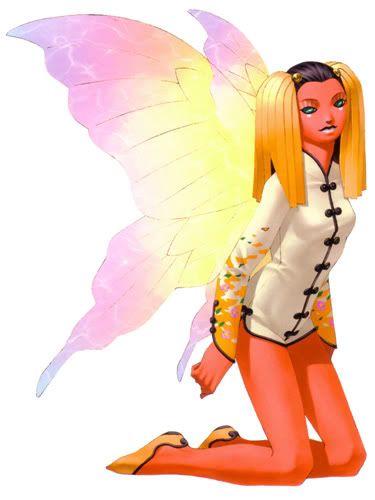
Hua Po is a demon from the Shin Megami Tensei series, she's featured in several of the games and probably one of my favorite demons, even though you get her along the lower levels. Her outfit basically breaks down into the suit, shoes and wings.

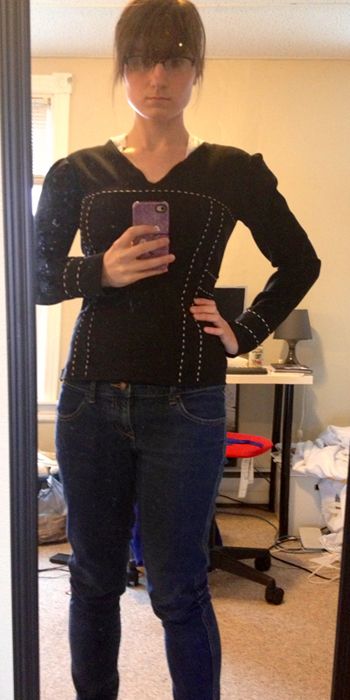
For the suit I found a pattern that was a basic jumpsuit pattern and modified it to what I needed. I ended up going with a vintage pattern: Butterick 6015 Vintage 60s Easy Jumpsuit Pattern, though the size I ended up buying was far too large and ended up seriously sizing it down, and of course cutting down the legs to create shorts. The frog details were purchased separately and attached to the costume, the jump suit itself was closed together with a series of hook and eyes, a small piece of black fabric added behind it to keep anything from showing. The black lining was done with bias tape, the hook & eyes were hidden under the bias and lined up to match each other.

Photobucket 

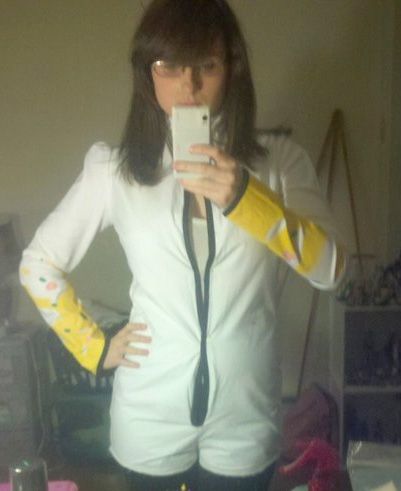
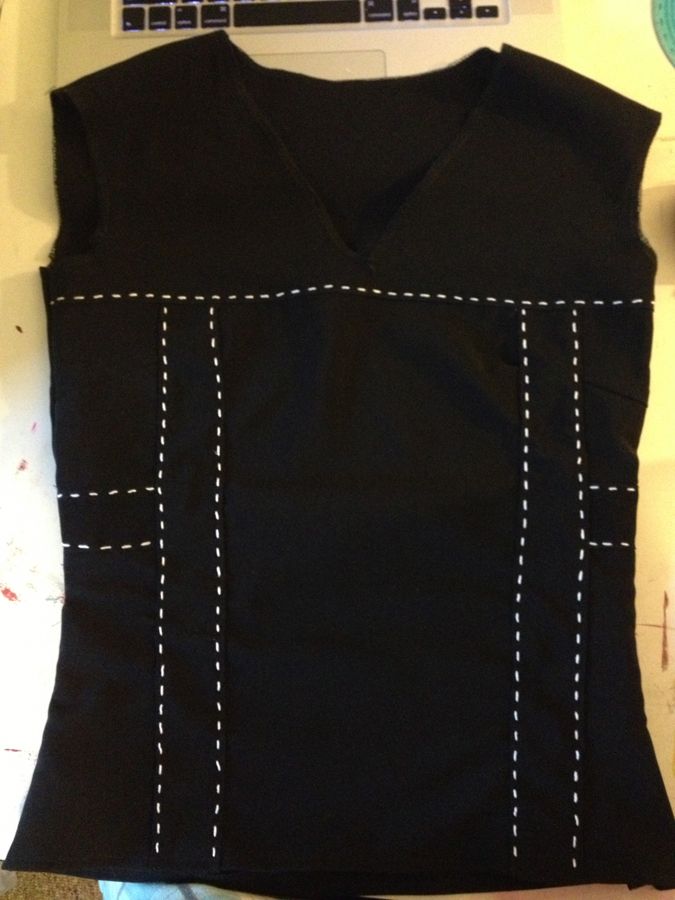
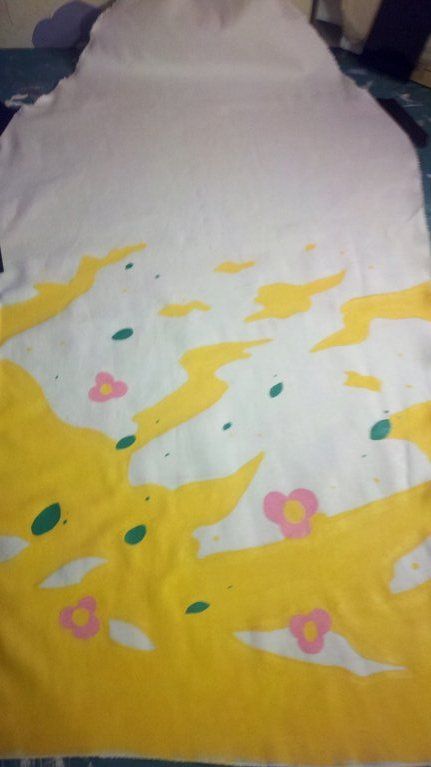
The designs on the sleeves were done with fabric paint, for this I used Tulip Fabric Paint. I ended up drawing the design on the sleeve and then painting over it. The best way of doing that was taping the fabric down before sewing it (other then hemming the edges) and just painting on directly. Once it dried I attached the sleeves to the suit. When your working with the fabric paint make sure you use several layers to get an even coat.

Photobucket 

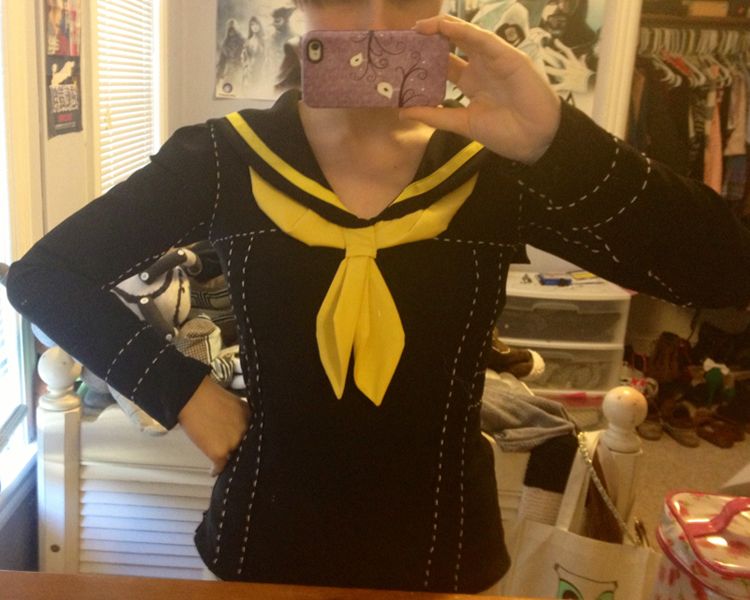
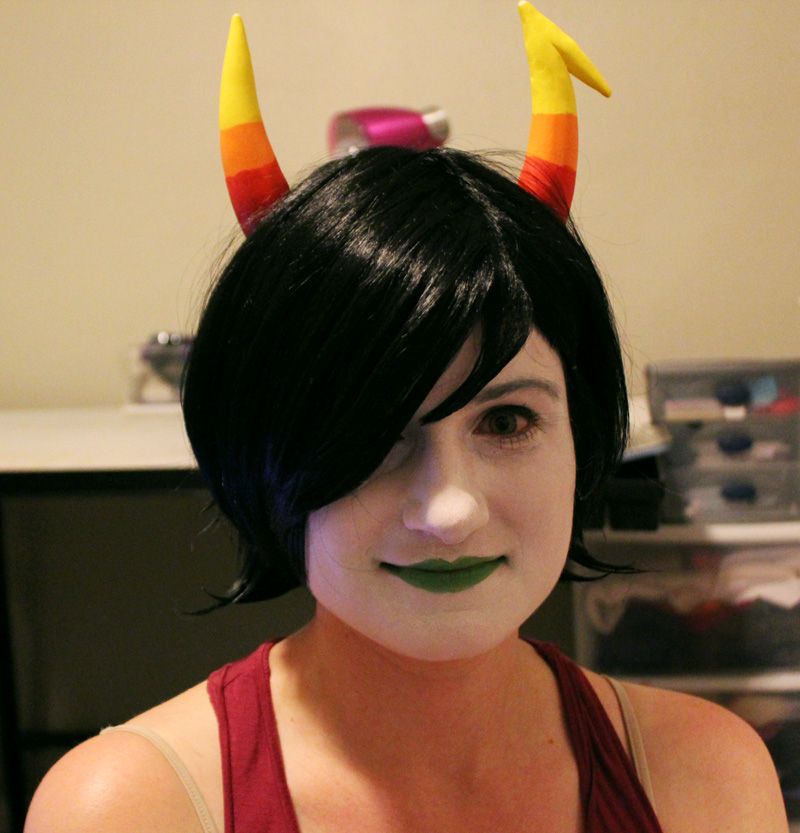
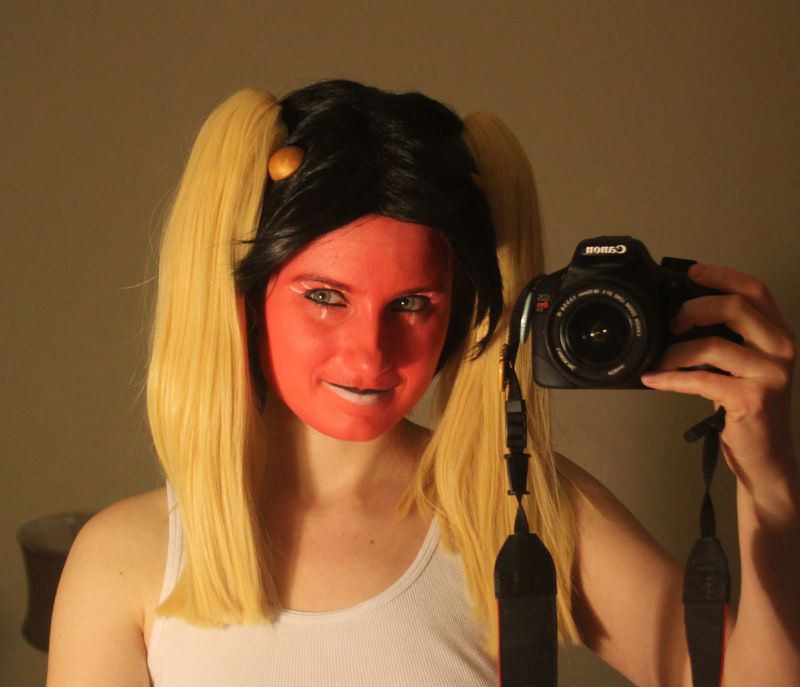
Now for the skin tone. I wanted to try and create the red orange tone the best I could in the easiest way possible. So I decided to do a face paint, tight combo. For the face paint I went with Ben Nye, because of the variety of colors you could get and the ease of use. When I was working with it, I had to do several layers on my face to get the smooth look. I just took a small makeup sponge and applied it on my face until I got the even coat. The lips and eye details were just done with regular makeup I had sitting around. The upper lip was some eyeliner I had, while the white details were basic face paint from a Halloween store. I probably wouldn't recomend doing it again, because the details tend to rub off over time. But the Ben Nye stayed really well after using powder and sealing it properly. Make sure you get the sealing spray otherwise the makeup will get everywhere! The make up is really easy to wash up with some basic face soap and water. I kept some make up remover cloth to help take it off. There was a few places along my face, like by my ears that didn't come off right away, so be careful.

Photobucket 

Rather then paint my legs I decided to go with tights. But the color was pretty unusual. So I needed to custom dye the tights to match my face. For the tights I bought a pair of white dancer tights so I wouldn't any awkward lines. For the dye I used Jacquard Acid Dye, because it would take the best with the nylon material. I really lucked out with the color because it matched pretty perfectly to the face paint.

Photobucket

I wish I could say I made the wings but I didn't. I sort of lucked out and found something pretty close color wise on ebay. Maybe when I have more time or money I'll make new wings that actually have the right shape to them.

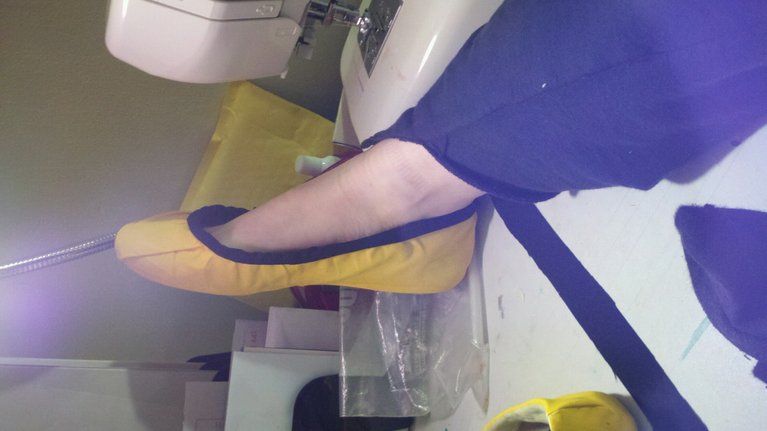
The shoes were worked off a base of an old pair of flat shoes that I never really wore. I just took yellow fabric and covered it over the shoe, gluing it down with hot glue. I probably wouldn't recommend that for any long term solution, but it worked really well for my wear at the con, since I didn't wear the costume for a long period of time.

Photobucket 

And last but not least the small clips on my head were just make with sculpey and attached on a small hair clip. They're fairly small and light so I didn't really have to worry about them breaking or anything.

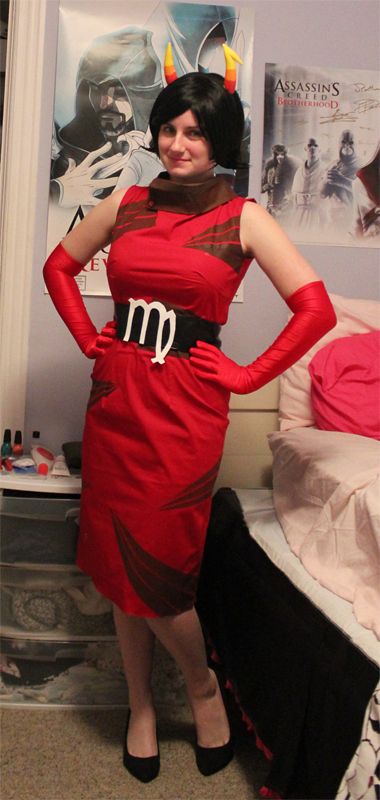
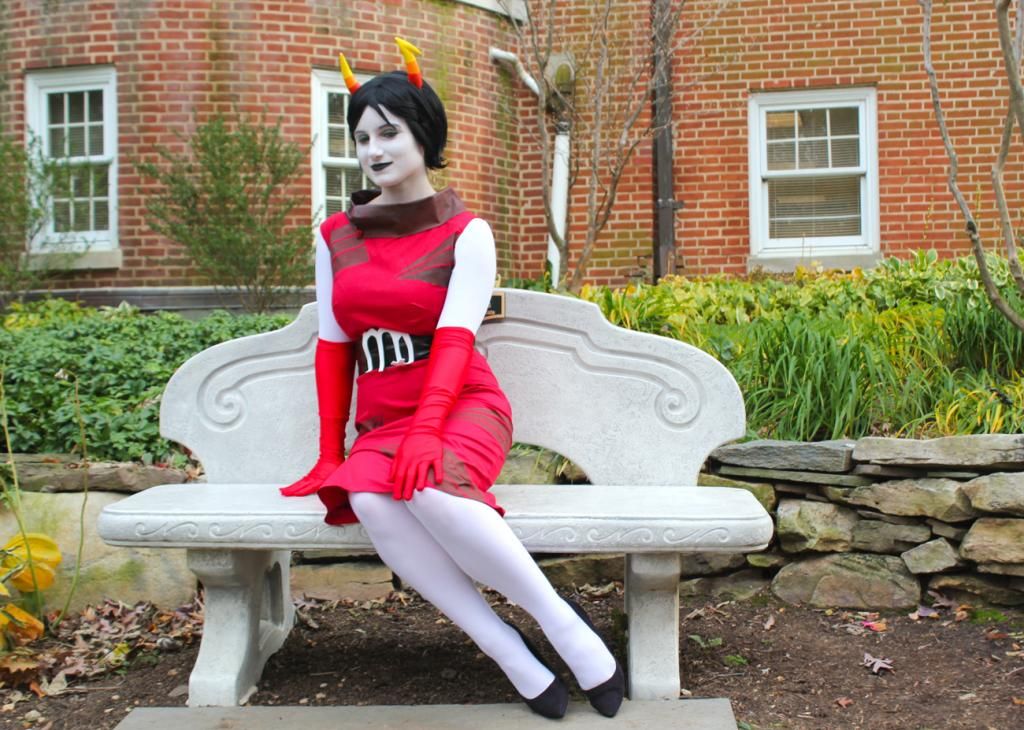
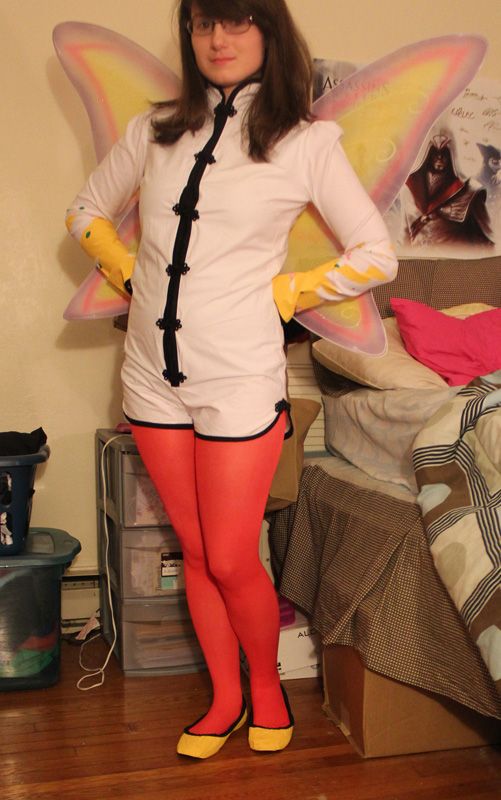
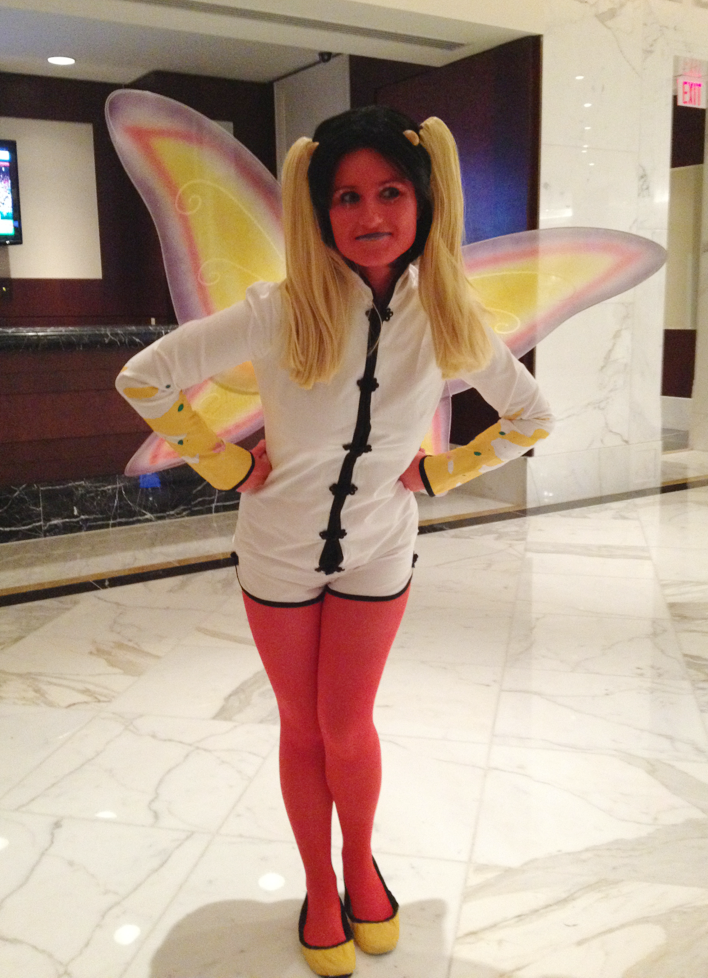
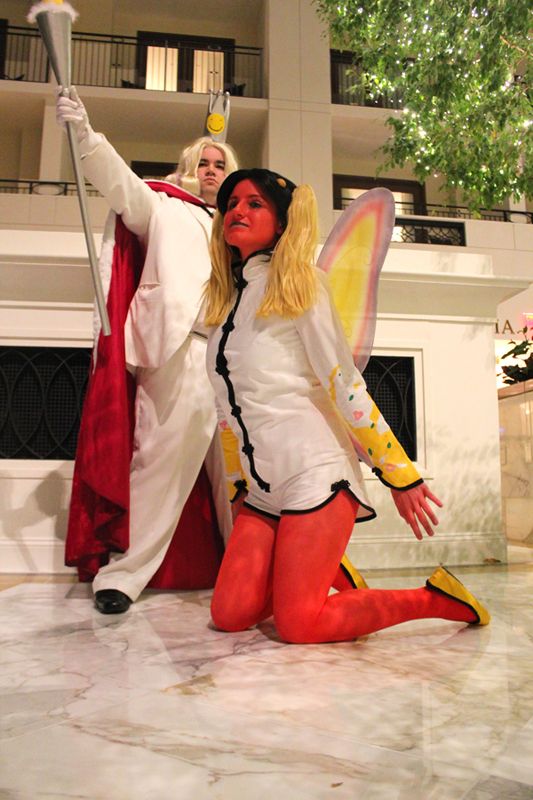
And last but not least is the final shots of the finished costume! Hopefully I'll be able to get nicer shots in the future!

Photobucket 
Photobucket 

Also as a side note, I've been reading this cosplay blog here, it's pretty great for some tips and tricks on all aspects of cosplay!