Thursday, June 23, 2011

Claudia Auditore

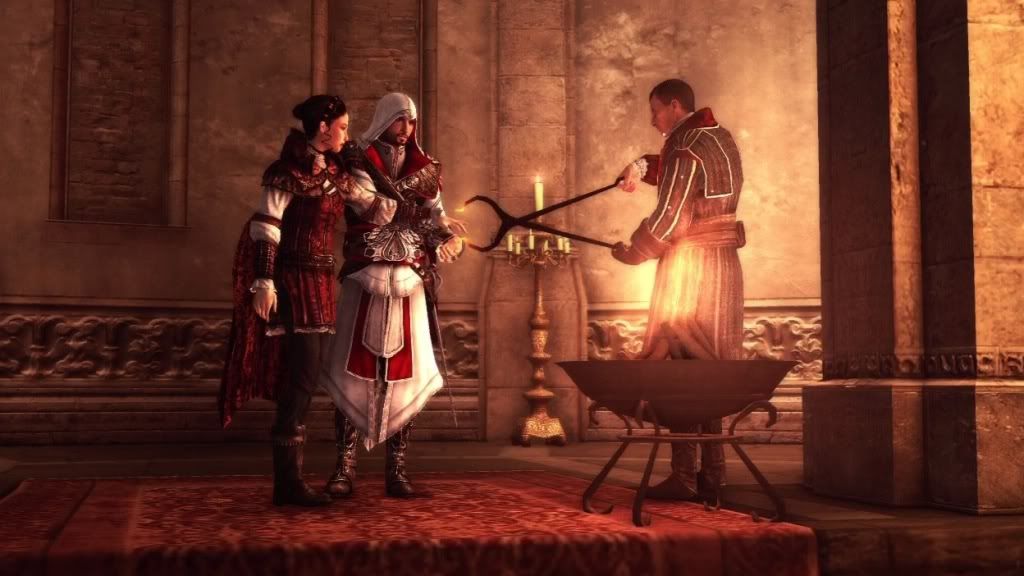
I'm pretty much basically finished with Claudia, enough to take as test run, there's a few details I need to fix up a bit but I thought I'd show you all the test run I did. So I thought I could break it down a bit more then I did in my previous post where I spoke more about the progress.

I wanted to cosplay Claudia after I saw her in Brotherhood, she was fine in AC2 but she became SO much better in Brotherhood. I was a bit anxious to start on that dress that she wears, I really never made anything like that before. But then I saw her new outfit near the end of the game...and fell in love. She got really bad ass and started fighting alongside her brother at the end sequence. I think I loved her character as soon as she stabbed those guards early one and took on a brothel herself just to help the brotherhood.

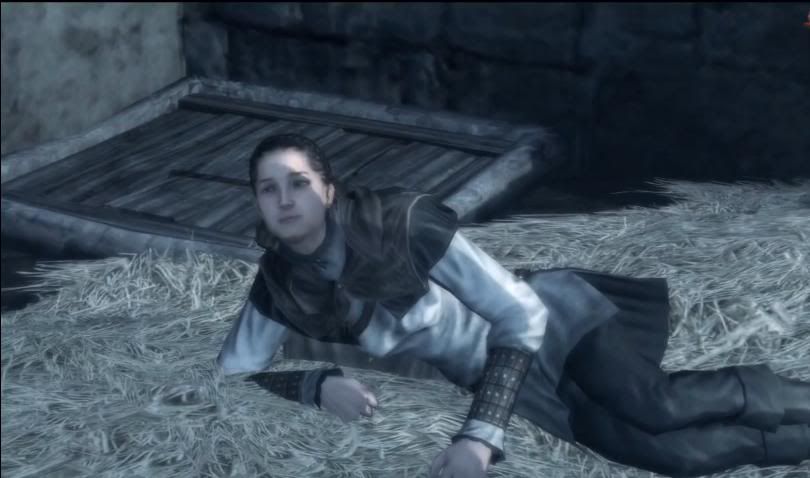
What was interesting about this outfit is how it was based off of Maria Thorpe's outfit from Bloodlines and the end of AC2.
Photobucket


Pretty interesting, just a few minor changes, obviously the color, choice of fabrics and the boots are pretty different. But overall the design is still the same and references her outfit.

The first part was her tunic. The tunic was based off of dress pattern I had laying around, the same dress pattern I used for Trucy. The pattern had to be modified a bit, because the top part was separate from the bottom, but it had the same panels I needed for her tunic. The panels go between a brocade and a satin. And in between there's bias made from the satin.

The front was probably supposed to come together with hooks or latches, but I went with ease for myself, not entierly period accurate but I'm wearing a cape so that little detail wouldn't be noticed. I added a zipper in the back and the front is sewn together with a ladder stitch, to give it that look that her tunic had. The inside is lined with a super light lining material. It's pretty near sheer, but the point was to keep the brocade from fraying. The brocade frays SO easily, I sort of wish I had fray check to keep it from being so annoying. I did end up using a zigzag stitch on my machine to help it, but it goes to show that a serger would really help. But you make do with what you have! And a zigzag stitch is a decent substitute if you can't afford a serger.

The shirt part was based of a blouse pattern I had laying around, but it's not a full blouse. I made it enough to where it met the tunic and then sewed them together. I mostly did it to avoid the amount of layers I had to wear, because I knew how hot I'd be in the costume. There's still the cape I had to wear.

The cape itself was drafted from my own patterns. I had a hood pattern laying around that I modified and used, the caplet parts were part drafted on my own and the rest I found something I could modify. I lucked out and had JUST enough fabric to make the actual cape part and line it. That wasn't too difficult, the difficult part was to use the bias around the caplets.

Bias itself is never too bad, it's the corners that can get you. I had never sew corners before.I found this amazing tutorial online on how to do it, and it really helped out a lot. What is missing and what I still haven't done is the design she has painted on the back of her cape. I still really need to get around to doing that.

The rest are bought. I was able to use my own hair for her since she just has it pulled back. The boots, bracers and belt are all bought and thanks to a friend I had a small knife to carry!

Finished
Photobucket

Photobucket

Photobucket
Also thanks to this Ezio for posing with me! He was fantastic.

With the finished photos from the test run I really need to fix up a few minor details. But overall I'm pretty happy with how it turned out and I'm even more excited to wear it to Otakon!

Monday, June 13, 2011

AnimeNEXT

Photobucket
AnimeNEXT
Garden State Exhibit Center Somerset, New Jersey
June 10-12

This was my first time going to AnimeNEXT, but it wasn't far away and for the price it was a really great opportunity. The con itself was split between three buildings, which isn't too unusual for some cons, some can split between several buildings near the same complex. They aren't too far away from each other, two of the buildings are connected. But the third building was across the street, with no real crosswalk to get there. So there was people watching the street and running across. It was really dangerous, as far as I know there wasn't really any other way to cross. I never have a problem with walking around the convention center or even having it spread out, but it was really too dangerous to have it across the street like that. There had to be a better way to do that, or another room within the two hotels that were there. The hotel I stayed in was just next door (across a bridge) would have been a much safer choice.

The only thing to see across the street was the game-room, which sadly was a nice game-room. Not as big as Magfest (though I doubt many other cons I'll go to will have a gameroom that big or nice) but it was good for an anime convention.
Photobucket
All very important rules.

Other then that I really didn't mind the layout. This con really had some amazing places to take photos. Right outside the doubletree was probably the best. There was this nice little bridge and outdoor area, as well as a walkway between the two hotels. The weather was a bit of touch and go. It rained on Saturday a bit, a sort bit in the middle of the day and right around the end, but not really bad enough to affect any gatherings or cosplays from what I could tell.

The dealers room was really nice and expansive, there was a ton of stuff there, but not a lot of my favorite booths sadly. But there was a lot of options for others. This was probably the first con I didn't get a figure.

The con had a rather large stage area for some of the musical guests they had (that doesn't really fit what I tend to like at a con but it was really nice and massive for the people who wanted to see that. While you're walking into the dealers room you could peak in and see. What I really liked was how nice and seperated the Artist Alley was from the Dealer's Room. They had their own space to sell their work, and they were able to keep it open longer for people who wanted to buy things from them. I tend to prefer them separate like that, there's less crowding and people in the dealers room when they're shopping tend to shop for two different things. I always like to think it's at least two different mind sets, and the prices work much differently.

They had a small food area, that sold pizza, sandwiches, all that good stuff, and it was so nice to have in the con center. The food was a bit pricy, between $5-6 for just one sandwich but that really can't be helped, the hotel will charge more. My one real complaint is that they were cash only, it would have been much easier if their machines took credit cards. There was a few ATMs around though for people to pull cash.

Overall it's a fairly smaller con. It's not utterly massive like Otakon would be, it's smaller but there was plenty of people around. It seems to be one of those cons that are just getting bigger with every year, which is probably why they have such an awkward spacing issue. I think this con is fantastic if you have a group of friends that you want to hang out with and get lots of really nice photos. None of the panels were really terribly interesting to me to check out, but I'm not exactly the person to ask about panels. But I adored the outdoor locations and taking photos and exploring the dealers room. I would go again next year, definitely.

Photo Highlights
Photobucket

Photobucket

Photobucket

Photobucket

Photobucket

Photobucket

And the rest of the photos are here. Don't forget to check out the subfolders!

Saturday, June 4, 2011

Remaking: Ukraine

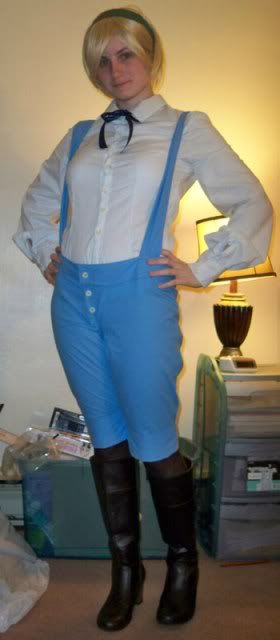
I originally made Ukraine in 2009. It was an early costume and it was the first time I ever made pants. That was an adventure in itself. I really only got to wear the costume to one con before I ripped them taking them off. This time I've learned from my mistakes and was ready to remake and re-wear this costume.

Photobucket
Old version.

The previous pair were really flimsy. I chose a really cheep thin material, and then I decided not to line it. So not only was it thing and flimsy, but it ripped easily because of that. The pants were too low, sitting on my hips when I needed it closer to my waste. Though at the time, there was only a few images of the character, so it wasn't terribly inaccurate. Now that more images and material have come out, I can make it a bit more accurate.

Photobucket
New version. My room has changed. Slightly.

The pants were really the only part I remade. The rest was still pretty alright to keep (though if I really wanted to, there's some minor stuff I could fix with the blouse, but it's pretty fine for now). So I chose a much better material, something with a slight stretch to it, for movement. The color is also slightly different. It's not as saturated as before, but I'm much more pleased with this color then before. I actually thought to make them baggy enough and long enough, I used a different pattern and I'm glad I did. Before the pants were near skin tight, and they hit just at the knee. With the new ones they are able to tuck under my boots like they're supposed to. I also added lining, and the thickness was worth it for the pants.

Sadly I still don't have a prop like I'd like to. Maybe another time I can!

Also I found out that I got a chance to go to AnimeNEXT. So I should have photos and a con report of that as well!

Also for sake of self promotion, I have Honekoneko plushes for sale on Etsy. You should go and buy one.